Thursday 28 May 2020

Inkscape - SVG to PNG conversion

Inkscape is an Open Source vector graphics editing application.
The primary file type  is the Scalable Vector Graphics format. Modern browsers support the format.

However, there are still applications where bit map or raster graphic formats are required (Microsoft Azure Marketplace still wants specific resolution PNG files). Inkscape is a useful tool to convert the SVG format files to PNG.

Inkscape is in the process of rolling out version 1.0 which changes the command line parameters - so check your version.

Installation

Inkscape is available via the Raspbian repository.
After updating and upgrading the operating system, use:
sudo apt-get install inkscape

You can check the installed version.
inkscape -V
Inkscape 0.92.1 r15371

Command line usage

Inkscape has an extensive GUI, but it can also be used via command line. This is particularly useful if you want to convert an SVG file to a number of different sizes.

You can see the full list of options by using:
inkscape -?
Or a concise list with:
inkscape --usage
The command line options used:
-z No GUI
-w Width
-h Height
-e Export file name

Example
inkscape -z -w 1024 -h 1024 picture.svg -e picture.png
WARNING: unknown type: svg:foreignObject
WARNING: unknown type: i:pgf
Background RRGGBBAA: ffffff00
Area 0:0:85.039:85.039 exported to 1024 x 1024 pixels (1155.99 dpi)
Bitmap saved as: picture.png

References

https://inkscape.org/
https://en.wikipedia.org/wiki/Inkscape
https://en.wikipedia.org/wiki/Scalable_Vector_Graphics
https://inkscape.org/doc/inkscape-man.html


Monday 25 May 2020

Setting a default screen size for a headless Raspberry PI

I have a few Raspberry Pis, and most of them are run "headless" (without keyboard or display).

Now the default screen size for a headless PI is what used to be called VGA and has a resolution of 640 x 480. This was state of the art in the 'nineties, but unfortunately the majority of software expects a larger display. This means that programs tend to fall off the available screen size, in some case losing the close button as well.

You can set the display resolution via the Raspberry Pi configuration tool or via the command line using raspi-config. The problem is that there is no guarantee that your chosen display mode will then work with your monitor.

This particuklar resolution (720p) works okay on monitors and via VNC. Other options are available.

This can be set by editing the config.txt file

sudo nano /boot/config.txt

Scroll down to this section (the highlighted text areas will probably read VGA and 1 respectively). Change the mode to 4 and the resolution description - that is for your information later).
# uncomment to force a specific HDMI mode (this will force 720p resolution)hdmi_group=1hdmi_mode=4
Use Control X, Y to save and accept the default file name to save the changes.

Reboot your machine and you should have a much more workable graphics screen on VNC.

References

Sunday 24 May 2020

Micro:bit Beacon - part 1: the beacon

One of the features of the Micro:Bit is its Bluetooth compatible radio.

Unfortunately, it is not available in Micropython due to the size of the Bluetooth software stack.

Whatt is available is a Radio object which uses the radio hardware to communicate between Micro:bits.

There is a neat program on the documentation site called Firefly. This has groups of Micro:bits communicating with each other.

Now this project uses the "flash" technique from the Firefly project.

from microbit import *
import radio
import utime
import machine

# "Flash" effect from the Firefly program
#https://microbit-micropython.readthedocs.io/en/latest/tutorials/radio.html?highlight=Firefly#fireflies
flash = [Image().invert()*(i/9) for i in range(9, -1, -1)]

# Obtain the machine id
machineID=machine.unique_id()

# Flash the display over a half second 
# and send the machine ID every second.
while True:
        display.show(flash, delay=50, wait=False)
        radio.on()
        radio.send(str(machineID))
        sleep(500)
        radio.off()
        sleep(500)


Sunday 3 May 2020

Chaos - and the Headless Raspberry Pi

Cryptography is a voracious consumer of randomness, and computers depend on cryptography for security. Most operating systems harvest this randomness (under the name of entropy) from various pieces of hardware, quite often from mouse movement or keyboard operation. This is fine when the computer has a keyboard and/or mouse, but what happens when the computer is running headless?

Raspberry Pis quite often run headless, and remote operation using products like RealVNC encrypt the communication between the server and the client. To maintain security, no connection can be made until there is sufficient stored entropy. This can lead to long delays between switching the computer on and being able to connect to it remotely.

The package haveged is available in Debian based systems (including Raspbian and Ubuntu) and fills the entropy pool when the supply falls below a set value. This will speed up the start up of RealVNC.

Installing haveged

sudo apt-get install haveged

References


My Raspberry Pi collection

This is my collection of Raspberry Pis.

None are retired, some see more use than others.

My First Raspberry Pi

This was bought in a sale at Maplins in (I think) 2013. It was in a deluxe starter set with a case, a wireless keyboard with track pad, a WiFi dongle, powered hub and power supply. I bemused the member of staff by checking the Raspberry Pi it was made in the UK.
The Raspberry Pi (1) required a USB WiFi dongle (visible in the photograph above).

It is currently in use as a command line only MariaDB SQL server, though there are a number of other SD cards for it in the SD Card box.

Second Raspberry Pi

This was another sale item from Maplins. This starter set was the base level one that had a conventional wired keyboard and mouse, WiFi dongle, powered hub and power supply.

I also bought another case, similar to the one above.

Later I bought a number of add on boards that I could not get into the case. Maplins (again) had the Pimoroni PiBow cases, and so I bought one of those.

They are made of laser cut acrylic slices that you stack on top of each other and the board is held securely inside). As supplied, there was a clear panel over the top of the board, but by shuffling the top panel to the bottom, you can have an open top that allows access to the GPIO.
This side shot shows the slices, and you can see the intended top slice on the bottom. The pattern visible on the clear (ex top)  slice is where the various access ports and grill are visible.
Pimoroni now do a range of cases without the top panel, the Breakout Garden Pi Zero makes use of one of them.

This one is used where I want to access the GPIO pins directly. It has been used on the Raspberry Pi Foundation Physical Computing course and measuring temperature using a DS18D20 sensor.

Raspberry Pi 3

This was bought in WH Smiths of all places (and I also bought the camera), the bonus was the I had a discount card! It has an Official Raspberry Pi case.
The case allows some access to the GPIO, but a number of HATS interfere with the support pillar visible in the photograph below.
This is a most travelled Raspberry Pi, it gets to go on holiday (I have an micro SD card with various podcasts and iPlayer programmes. It also allows me to back up photographs if required).

It normally has my development micro SD in place, with all the languages and tools I use.

The OctoCam

 It comprises a Raspberry Pi Zero W, a 5Mp camera, Mini HDMI to HDMI cable, an On The Go cable and optional headers and stickers.
This uses the MotionEyeOS to function as a web cam.

Breakout Garden Pi

This is detailed here.

This normally runs as a temperature (plus humidity and pressure) display using a BME280 breakout board with the results displayed on the 1.12" screen.

Raspberry Pi Zero W

This Raspberry Pi Zero W is in an Official case and uses the top plate with the camera mount.

The camera was bought at the same time as the Raspberry Pi 3. Fitted in the Zero case provides a suitable housing. It is part of a project to scan ISBN numbers (and will be powered by a USB battery pack).

Pirate Audio headphones' amp

This uses a Pi Zero with pre-soldered header and the board to produce a music server.
As I have a large number of CDs, it also incorporates python software to copy files from CDs.
Details of the project here.

Raspberry Pi 4

The Raspberry Pi 4 is in a Pimoroni Heat Sink case. It uses micro HDMI sockets and is powered via a USB C socket. It is currently due to take over the development Raspberry Pi slot.

Saturday 2 May 2020

Raspberry Pi 4 and the Pimoroni Heatsink case

The Raspberry Pi 4 was released in June 2019, but I have only just bought my first one. When released, there was a 1GB, 2GB and a 4GB version. The 1GB version has been discontinued for consumer purchase, but in line with the Raspberry Pi Foundation's long term support ideals will be available for commercial purchase while there is still demand.
The board is supplied in a standard cardboard box with a (very brief) quick start and be careful guide.
I forgot to photograph the board before assembling it into its shiny new case. Maybe next time.
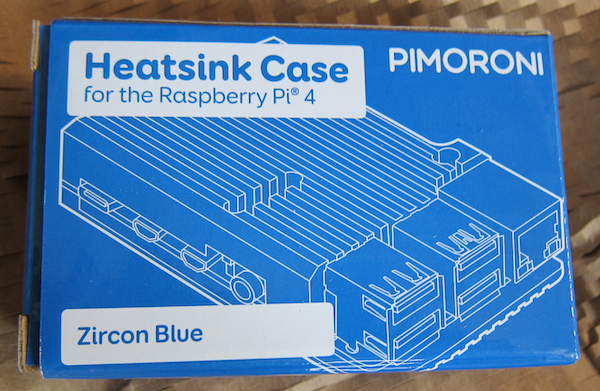
I bought my Raspberry Pi 4 from Pimoroni, and I also bought their bright and shiny Heatsink case.

Before assembling the board into the case, I installed the latest version of Buster onto an SD card using the Raspberry Pi Installer. This was then inserted into the board.

It was at this point I realised that I had forgotten two things.
The Raspberry Pi 4 is a lot more power hungry (hence my choice of the heatsink case) and so has moved away from the traditional micro USB power connector to the USB C type connector.

The second is that to make use of the dual 4K screen option, the monitor connection(s) use the Micro-HDMI connector.

There is a dedicated USB-C power supply available, and I probably should have ordered one (there is also a micro USB to USB-C adaptor). However, I ended up buying a 1m USB-C cable from my local supermarket.

The micro-HDMI cable would have been a bigger issue, but it turned out I had one in my cable collection.

Assembly of the case was straightforward. There is a tutorial here.

The only problem I had was with the thermal conductive pad. When I came to remove the backing sheet, it managed to tear and ended up looking like a blob of blue tack. Luckily there is a spare one which came in handy. So when fitting the thermal conductive pad, be very careful.

Here is the Raspberry Pi securely fitted into its case.

As you can see, the network port and the USB connectors are exposed, not just the sockets. The case will keep fingers away from the delicate components but it does not protect against much else.

There is a slot for the screen out cable, and the camera cable. The power over Ethernet port is also exposed.
The GPIO is available. It is claimed you could just plug a HAT in as normal, but it is recommended that you use a  booster header to raise the HAT well clear of the case to prevent any chance of it contacting the case and causing a short.
Side view showing the GPIO pins.
End view showing the USB 3 and USB 2 sockets and the higher speed Ethernet connection.
The other side view, showing the USB-C power socket, two Micro HDMI sockets for dual monitors and the composite/headphone socket.
The other end view showing the micro SD card and the camera connector.
If you have the option, it is well worth having your Raspberry Pi plugged connected via Ethernet. It makes the initial set up so much faster.

The Raspberry Pi 4 require Raspbian Buster or higher. The default behaviour appears to be different to previous builds. Previously, if you started a RaspberryPi up without a monitor, it would (by default) have a (virtual) GUI screen with what looked like VGA resolution. If you were using it with RealVNC to operate it remotely, this would be annoying as the resolution was not compatible with most of the applications etc. With Buster, no GUI screen (virtual or otherwise) is generated. If you plug a monitor in later, you just get a blank screen. This is annoying.

The solution is to set a default screen size (be careful that this screen resolution is actually supported by your monitor.

This can be done via the command line using:
sudo raspi-config