Showing posts with label LEDs. Show all posts

Tuesday, 29 August 2023

Cosmic Unicorn

 Pimoroni's Cosmic Unicorn is one of their range of Pico W Aboard products and comprises a 32 x 32 smart RGB LED matrix. 

There is a complete Pico W attached to the back of the board. The use of a complete Pico W means that you can use the existing certification of the board, which means you can bring Wifi powered products to market quicker as you do not need to get your product certified, it is all off the shelf.
There are four general purpose buttons, a pair of volume up/down buttons, a pair of brightness buttons, a Sleep button and a Reset button (to save wear and tear on the USB socket). There are two STEMMA/QWIIC sockets for I2C breakout board and a speaker.

There is a hanger at the op, four holes in the corners and two holes to take a stand.

Out of the box there is a simple demo application. It suggests you press one of the four buttons (but does not tell you where they are or what they do). The four options were a fire simulator, a supercomputer style display, a rainbow and a calendar (requiring WiFi credentials).

This was a simple UI upgrade, listing the options and tracing the location of the relevant button.
As you might of noticed the options displayed do not reflect that list, but include a clock.

Pimoroni have developed a graphics library that works across a range of display devices. 
The original work on the clock was for an Inky Frame eInk display board. As this seven colour display takes thirty seconds to update the display, the development took place on a LCD Display Pack.

It was very easy to port the code to the Cosmic Unicorn.

Integrating it into the supplied program required some minor changes - which will be detailed later.
Three of the original effects are still available.
The fire effect display.


Tuesday, 20 December 2022

PIMORONI Plasma Stick 2040 W Christmas Lights

 So having played around with the Plasma Stick 2040 and run a web server on it, it was time to use it for Christmas lights

Initially the idea was to use the PICO W as an Access Point and control it via a web interface. This would make it independent of any local access point. Unfortunately there were some issues which I was unable to resolve before I needed to use the lights in the field. So to be able to change the lights a Rotary Encoder was plugged into the QWIIC socket via a Breakout Garden to QWIIC converter and a QWIIC cable.

For Christmas tree lights of course, the existing web server could have been used, time waits for no developer so it was used "as is".

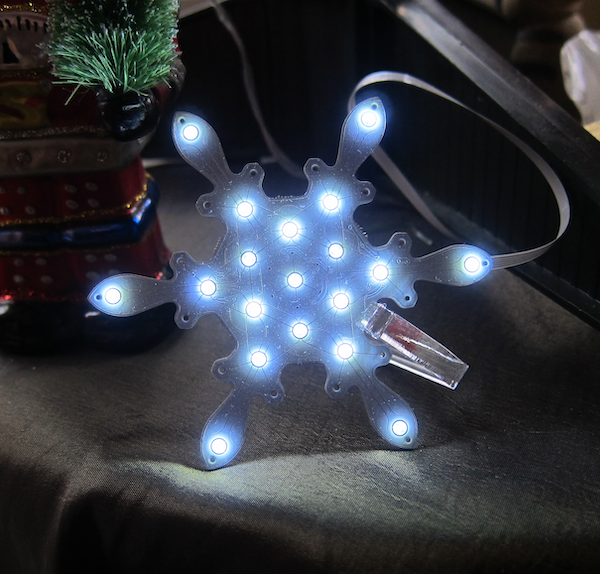
In addition there is a Pimoroni Snowflake Solo on the tree.


Sunday, 2 January 2022

PIMORONI Snowflake Solo

 Pimoroni released their Snowflake product based on a design by Lucky Resistor a number of years ago.


I thought it looked great but was not sure if five of them would be a bit overwhelming.

This year they introduced the Snowflake Solo, a single Snowflake board and a controller board all on a single beautifully crafted PCB.

The Snowflake Solo comes on a single etched PCB and includes a 200mm flat cable to run between the control board and the Snowflake.
Half etched supports hold the control board and the snowflake onto the PCB. There are instructions here on how to separate the components from the carrier board. The important thing is to bend the carrier and not the snowflake/controller board.

Once the two boards  are separated they need to be connected. The connectors on both boards are identical (note that there are two connectors on the snowflake - an In and an Out).
On the control board and the In connector on the snowflake, flip up the connector to open it, insert the cable with the blue side upwards, and close the connector.

The control board has a micro-usb socket for power, I used one of my Raspberry Pi Zero mains adaptors, any micro-USB charger should be fine.

The snowflake is programmed with a number of different patterns, these can be selected by clicking the centre button on the control board. Click it once to select change mode, then click it a number of times to select the rquired mode.

The acrylic stand is quite a tight fit.


Wednesday, 25 December 2019

Merry Christmas

At this festive time of year, here is a flashing Christmas ornament.


This is an Adafruit Circuit Playground Express in an enclosure powered by a USB power block.