Pimoroni have recently released a base to interface a Raspberry Pi 5 to a Solid State Drive.
Components
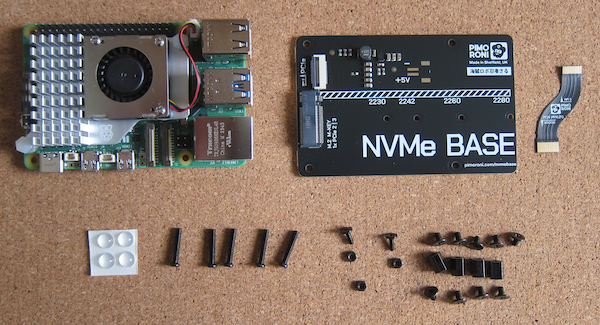
Raspberry Pi 5 with 8GB of RAM.
A Raspberry Pi 5 Active Cooler (fan and heat sink).The Active Cooler comes complete with pre-fitted heat sink pads.
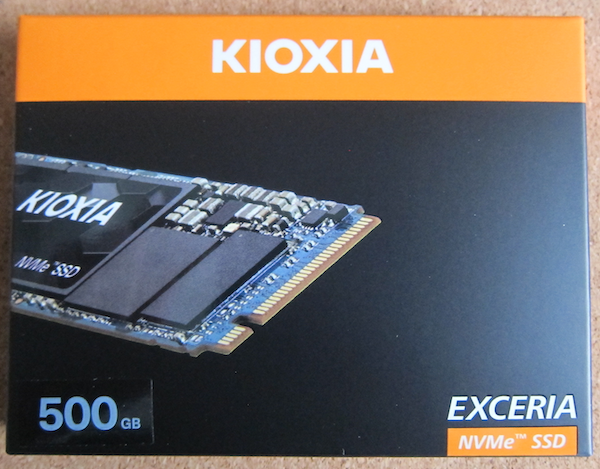
A 500GB SSD.
The Pimoroni NVME base.
The NVME pack contains the base plate itself, a pack of crews and nuts, a ribbon cable and some self-adhesive feet.
Of course you need a power supply.
Assembling the Raspberry Pi 5 with the active cooler
Remove the backing paper from the heat sink.
Check the operation of the spring-loaded attachment pins.
Align the pins with the relevant holes in the Raspberry Pi board.
When they are aligned, push the pins through the cooler board until they are attached to the Raspberry Pi board. Ensure alignment before releasing the pins so the heat sink material adheres to the required components.
Plug the cooler power lead into the Raspberry Pi board.
Create the OS SD card
The latest installer allows you to select the hardware, in this case a Raspberry Pi 5, as well as the operating system.
The NVME base requires 64-bit Raspberry Pi OS.
Select the 64bit Raspberry Pi OS.
Image the SD card.
Once the OS is ready, slot the SD card in and boot.
Finish the set up for the OS including a full update..
Building the NVME base
- • NVMe Base PCB with M.2 Slot (M-Key)
- • 'PCIe Pipe' Flat Flex Cable
- • 4x Rubber feet
- • M2 bolt and 2x nuts for SSD mounting
- • 4x 7mm M2.5 standoffs for base mounting
- • 8x short M2.5 bolts for base mounting
- • 4x long M2.5 bolts for 'pass-through' mounting with a HAT
Fit the short M2.5 bolts through the base and add the stand-offs.
Carefully remove the SSD from the packaging. In this case, there are instructions in the box showing how to remove the SSD (you use one of the finger holes and rotate it out of the plastic carrier).
Take the M2 bolt and fit to the base for the size of SSD. Fix in place with one of the nuts.
Take the Raspberry Pi board. Gently lift the cover on the PCIE connector.
Take the ribbon cable. The image ill face outwards when fully assembled and the Pi end is the smaller (so the text is the right way up when the NVME base is at the bottom.
Hold the cable in place (copper side towards the centre of the board) and push down the latches.
Turn the Pi upside down and bring the NVME base in.On the NVME board, flip up the connector. Fit the ribbon cable. Once it is correcly aligned, flip the latch down.
Now screw the two boards together carefully.
Turn the Pi - NVME board sandwich (with its SSD filling) upside down.
Apply the self adhesive feet. The left hand end is easy as they can go in the top and bottom corners. The right hand ones can go just in-board of the screws.
Software installation
Switch on your Raspberry Pi.
Log in as normal (you should have already configured the SD card earlier).
The Raspberry Pi needs to have the latest updates including firmware. The normal update should work, but you can force the update via sudo raspi-config. Update the firmware using sudo epi-eeprom-update.
You can format the the SSD using the Raspberry Pi Imager. It should allow you to import the settings from the SDD card (locale, WiFi etc).
Once that has completed run sudo raspi-config in a terminal window.
Go to the Advanced section and change the boot order to boot from the SSD.
Reboot.
The Raspberry Pi will boot from the SSD.
References
Raspberry Pi 5
https://shop.pimoroni.com/products/raspberry-pi-5?variant=41044580171859
Raspberry Pi 5 Active cooler
https://shop.pimoroni.com/products/raspberry-pi-5-active-cooler
NVME Base
https://shop.pimoroni.com/products/nvme-base?variant=41219587178579
Assembling the NVME Base video
https://www.youtube.com/watch?v=odG7FbptgWQ


