Introduction
The Raspberry Pi AI HAT+ add-on board has a built-in Hailo 13 (8L) and 26 (8) tera-operations per second (TOPS) AI accelerator.
Data transfer is via a PCIe interface (so is only compatible with Raspberry Pi 5s, not earlier models).
The Raspberry Pi 5 will detect the presence of the Hailo Accelerator and can use the Neural Processing Unit for supported AI tasks, including the built in O/S rpicam-apps post processing tasks.
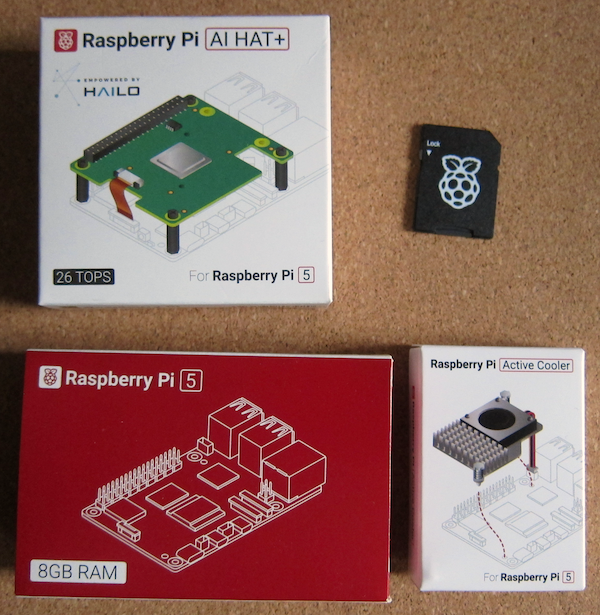
What you need
Installation
This installation follows the general procedure described in the instructions.
However, if you wish to use a PiBow Coupe case with this build, ensure that you begin fitting the case components before installing the Active Cooler as it is not recommended to remove a previously installed Active Cooler.
So I have a PiBow Coupe case for another Raspberry Pi 5 (luckily I also ordered a Raspberry Pi Bumper case at the same time).
Install the Active Cooler
The Raspberry Pi 5 tends to run hot, so the Active Cooler (or a case with a fan) is recommended.
Now, probably the board and the SD card should be tested before installing the cooler (as removal of the active cooler is not recommended and likely to be messy).
Remove the backing paper from the Active Cooler, this shows the heat transfer pads.
Before adding the Active Cooler, remove the blanking piece from the Fan connector on the Raspberry Pi board. It is possible to remove when the Active Cooler is attached, but it is more difficult.
Orientate the Active Cooler above the Raspberry Pi board so the fan enclosure is towards the USB and Ethernet enclosures. Align the two pins with the corresponding holes in the board and ensure that the fan cable is clear. Once aligned correctly, gently push the end of the pins through the board. The spring clips will hold the pins in place.
Initial Software Set up
First ensure that the Raspberry Pi has a suitable SD card installed. I ordered a pre-loaded example.
Boot and configure as per normal.
I have found that the WiFi is not detected, so had to miss out on the O/S update until the initial setup was complete and then added the WiFi. There was a slight issue with the first software update which required a call to dpkg to clear up.
As it was a clean new install the following two steps may not have been required but were undertaken.
sudo apt update
sudo apt full-upgrade
The boards firmware needs to have the required updates so run:
sudo rpi-eeprom-update
Check date, if after 6 December 2023 it is fine otherwise use raspi-config to update the bootloader to the latest version.
Then run
sudo rpi-eeprom-update -a
Reboot (sudo reboot).
Install the AI HAT+
The AI HAT+ comprises the board itself, an extended header (of which more anon) and a fixing kit.
Note that the ribbon cable is taped to the board. Remove the tape before proceeding (carefully).
The instructions recommend removing the ribbon cable from the board, but neglect to inform you how to release it. I managed to leave it in place.
Align the stacking header with the pins on the GPIO, there is no orientation, just make sure that the pins are aligned with the holes. Push firmly down.
There are four short and four long screws included in the kit, the instructions show the smaller screws in use at the bottom, but because I was using the Bumper Case I used the longer ones, passing through the holes in the case. The spacers were then screwed into screws (not too tight).
It is at this point that the instructions suggest inserting the ribbon cable into the PCIe socket on the board.
Lift the cover on the PCIe connector and insert the end of the ribbon cable. If you have left the cable in the board, then you will probably need to move on to attaching the AI HAT+ to the spacers before fitting the cable to the Raspberry Pi.
Use the remaining screws to attach the board.
I mentioned the stacking header earlier.
Fit the cable to the board.
Software installation
There is a recommendation that the PCIe interface is set to Gen 3.0. There are instructions here.
Install dependences
sudo apt install hailo-all
Reboot
Check everything is working with the following command:
hailortcli fw-control identify
If you get an error 13, check that the cable is inserted correctly.
Next steps
Test the board with a USB camera (I am not intending to use the board with a camera so I have not installed one).
That is for another post.
References:
https://shop.pimoroni.com/products/pibow-5?variant=41045302542419
https://shop.pimoroni.com/products/raspberry-pi-5?variant=41044580171859
https://shop.pimoroni.com/products/raspberry-pi-5-active-cooler
https://shop.pimoroni.com/products/raspberry-pi-ai-hat?variant=53502129701243
https://shop.pimoroni.com/products/microsd-card-with-raspberry-pi-os?variant=31703694245971
https://shop.pimoroni.com/products/raspberry-pi-5-bumper
https://www.raspberrypi.com/news/raspberry-pi-ai-hat/
https://www.raspberrypi.com/products/ai-hat/
https://cdn.shopify.com/s/files/1/0174/1800/files/Raspberry_Pi_AI_HAT_product_brief.pdf?v=1729683532
https://www.raspberrypi.com/documentation/accessories/ai-hat-plus.html
https://www.raspberrypi.com/documentation/computers/ai.html
https://www.raspberrypi.com/documentation/computers/raspberry-pi.html#pcie-gen-3-0
https://en.wikipedia.org/wiki/AI_accelerator
https://en.wikipedia.org/wiki/Hailo_Technologies


